Showing posts with label Recipes. Show all posts

Monday, 21 May 2012

Dandelion Syrup or Dandelion Honey

It's all the rage out here in BC to pick those lovely yellow blossoms and make them useful!  Did you know that besides being a supporter of liver function and cleansing, dandelion helps your brain?  It was brought to Canada for it's nutritional support to build your blood, etc so there must be something we can do with it in 2012!

Do a quick search online for recipes and you'll find some good ones, I just don't know if I should post them all on here.  Aww, changed my mind, here is a link to a blog and then you can go from there.
click here
and try HERE  as well.
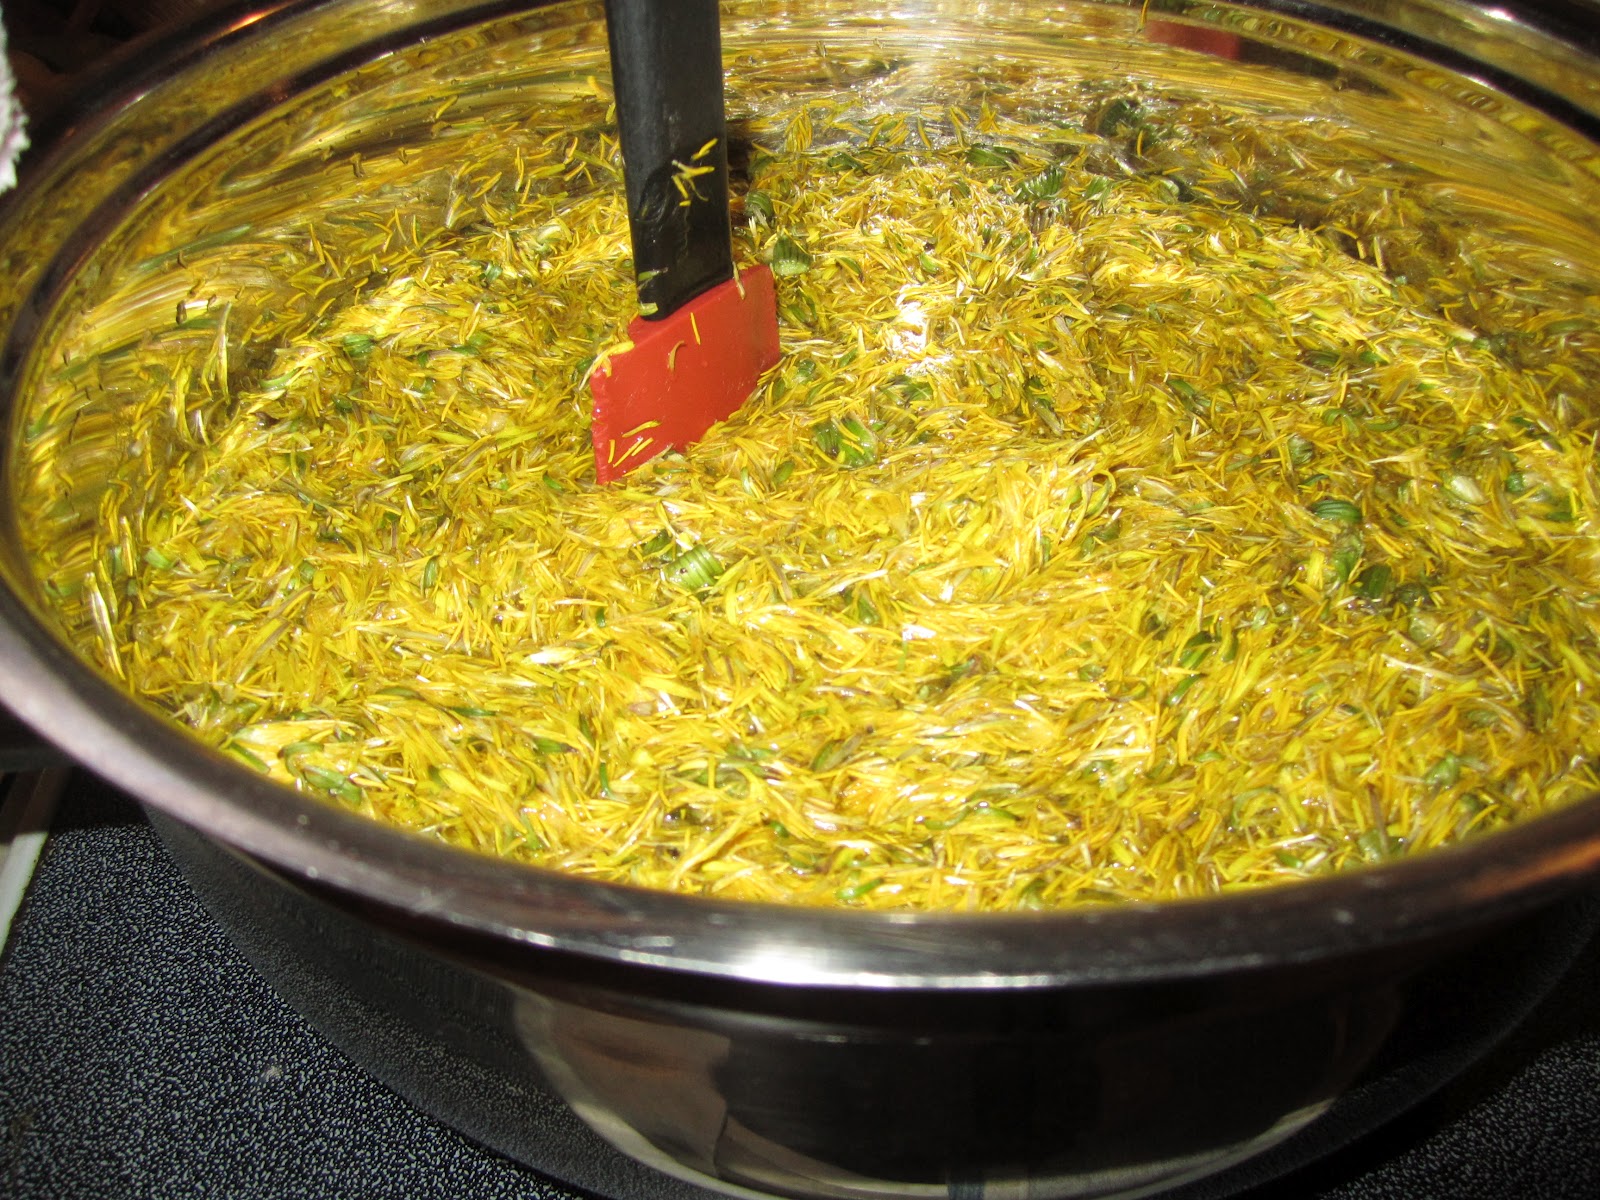
 We picked nice big yellow dandelions, shook out bugs, then I sat and watched a movie while I used scissors to cut the yellow flower off the green parts.  You can also pull it with your fingers, they get very green and sticky though. 
 Some say to leave no green, but it was late and I didn't bother taking ALL the green parts off.  I also did not measure anything, sorry, I was just not feeling like it.  I poured my yellow dandelions into a pot and then covered with store bought water.  It was just like making mud pies!
 I brought it to a boil, boiled and stirred for 1 minute, turned the element off, stirred and then let sit, covered, over night.  Then strain out the flowers.  My liquid was dark, not a nice yellow like it some peoples pictures.

 I added honey, as we are trying to stay away from sugars as much as we can because of some other health problems.  I added 1 1/2 cups of honey.  It was NOT thickening, even after hours of simmering.  We still ate in on the pancakes and it was sweet, not real flavorful when put together with a pancake.  I did NOT use lemon, as I had wanted to taste it free of any other flavors first.
We got these 4 jars full.  Then I decided... hey, I'm going to put 3 of the jars back on the stove and boil them.  Added 1/2 cup of brown sugar and boiled them.  Then I had 2 jars and it was more like a syrup.  I can see myself adding a scant teaspoon of it to my tea.

My experience ~ I'll have to try again and may have to use brown sugar.  It was so sweet with honey and didn't thicken, unless I need to BOIL it instead of simmering.  Makes me wonder if any nutrition is left in it though when it's heated so much.  ACK... it tastes good and has got to be better than store bought syrups.

Sunday, 18 March 2012

Banana Oatmeal Surprise Muffins

Banana Oatmeal Muffins with a Surprise filling!

Banana Oatmeal Muffins

1 1/2 cups Flour
1 cup Rolled Oats
1/2 cup White Sugar ( I use a little less, or brown sugar)
2 tsp Baking Powder
1 tsp Baking Soda
1/2 tsp Salt

2 Eggs
1/4 cup Cooking Oil
1/4 cup Milk
1 cup Mashed Ripe Bananas

Stir dry ingredients together, make a well in the middle.

Beat wet ingredients together.

Pour wet into dry and mix loosely, no dry parts.  

I put 1 small scoop of batter into my greased muffin tins.  Then added 1 tsp of Strawberry/Rhubarb Jam.  Then added more batter on top.

Bake 375 for 20 minutes until brown on top and cooked through.  

THRIFTY NOTE:  Banana's are the cheapest fruit around here, this uses them up.  Oats makes the muffins pack more nutrition and fill you up more.  Putting jam in the middle is a great way to use up little bits left over in jars in the fridge.  Also gives more sweetness, so you can use less sugar.


Stay tuned to see how my Gluten Free version will turn out!

Homemade Perogy Recipe


Kate wanted homemade perogies for her birthday party celebration...so we got a rollin' and pinchin'!


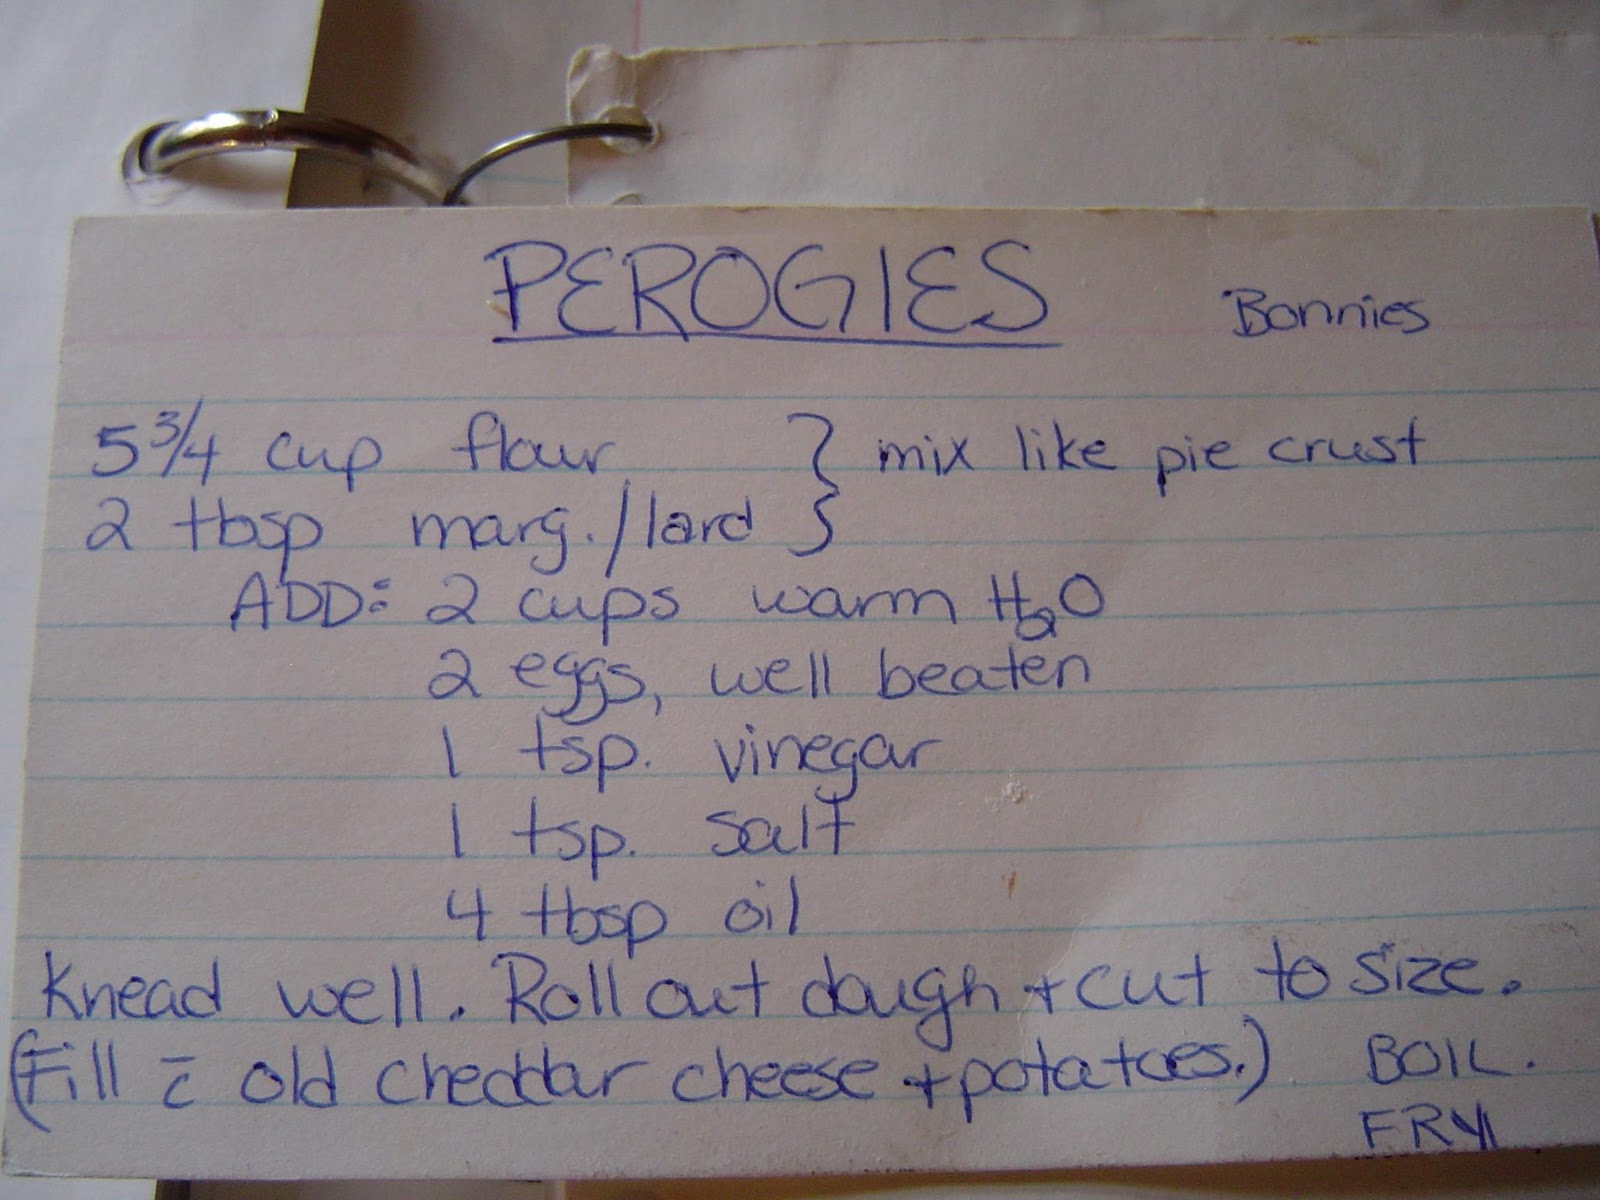
Start with a good dough recipe.  We looked at many and settled on this one.  I have since found another recipe that is very simple as well, but he said it's a bit of a secret :)

I precooked all the potatoes and made my filling ahead of time.  It should be cold so it doesn't start cooking the dough, etc.  I also made cottage cheese filling with 1 tub dry cottage cheese, 1 tub wet 2 % cottage cheese, 2 scoops cooked potatoes, 3 egg yolks and 1 tsp salt.  Worked well.  Cottage cheese are the hardest to get to stick together and not pop when boiled.  
The best is using dry cottage cheese with a little salt,  but it is so expensive.
Try putting homemade sauerkraut in some or try fruit fillings too... so many choices!

A bosch makes the dough work so easy peasy

Nana helps roll the first ones, being fancy with making them in actual circles.  Roll thin or you'll end up with very chubby and tough perogies.

Let children make weird baby perogies and giggle giggle

Others take this job very seriously and perfect the art.  Place a little ball of your filling inside the circle, fold over and start pinching.  Various sounds are optional...like blup blup blup


Little pre-shaped balls of mashed potatoes, medium cheddar cheese and a little salt.

 Making the little balls to fill the perogies

Boiling the first dozen, just to see if they are edible and stay together.  Most recipes say to boil for 5-10 minutes.  I ended up doing 7 minutes.  We love them fried up the next day as well.

Yup, they are yummy and disappear too quickly!


Another option is to just cut the dough into squares.  Then there is no waste and no "re-rolling" the dough as it can get tough.  The other option is to use the left over scraps as noodles. 
 Not a bad option at all we say! 

If you do the square, they look square instead of the 1/2 circle.
We froze them on racks and sheets and then put them in freezer bags later.  
YUM YUM!

Sunday, 11 March 2012

Gluten Free Pineapple Upside Down Cake Recipe

Oh my oh my ~ we have a new family favorite in this house!  We have been going gluten free and I will be sharing some failures and also some successes, like this cake!


I did an internet search for recipes and came up with this one:  The only thing I did different was use a little less sugar.  Seems like most white base cakes are made by whipping egg whites into meringue and so they are very light.

Pineapple Upside Down Cake ~ Gluten Free

Ingredients:

  • 3 tbsp shortening or margarine
  • 1/2 cup plus 2 tbsp brown sugar
  • 3 pineapple rings from a can, cut in half
  • 4 eggs, separated
  • 1/2 cup sugar, divided
  • 9 tbsp rice flour
  • 1/4 tsp salt
  • 1 1/2 tsp lemon juice

Preparation:

Melt shortening with sugar in a 9-inch by 5-inch loaf pan and arrange pineapple slices in sugar mixture. Separate eggs, and beat egg whites until frothy. Add 3 tablespoons sugar and beat until stiff, but not dry. Sift in 6 tablespoons sugar and beat until stiff again.
Sift together the rice flour, remaining sugar and salt and set aside.
Beat egg yolks until thick and lemon colored. Add lemon juice and flour mixture. Beat only until smooth.
Add a small amount of beaten egg whites to yolk mixture and stir until blended.
Fold in remaining egg whites with rubber spatula.
Pour batter over pineapple.
Bake at 350 degrees F. for 25 to 30 minutes. Let stand 5 minutes. Turn upside down.

Friday, 9 March 2012

A meal for under $1 each

This is how we enjoyed a wonderful meal for 5 people for under $5 ~ seriously!

 Venison steaks ~ $0.25/lb (because we did this all ourselves)
Asparagus $1.89/lb (biggest expense and treat)
Mushrooms, cauliflower, onions, (about $1 worth)
Rice Noodles (used half a package for $1)
It was delicious and frugal.  We're going gluten free, so I am keeping track of the price difference.  We are not nearly as hungry all the time as when we were eating wheat and my hubby bought about $40 worth of veggies on his way home from Calgary and we're still eating from them 1 week later.
Note to self: It can be done!

Cornbread Recipe from Homestead Blessings

This is a recipe I tried from my new The Homestead Blessings Cookbook from the West Ladies.  This is the cookbook that I will be giving away when I reach 25 Followers too.
Click Here for Giveaway!
I doubled the recipe for my round stoneware and it was wonderful!
 COUNTRY CORNBREAD
2 cups yellow cornmeal
2 tsp baking powder
1/4 tsp baking soda
1 tsp salt
Mix well, then add:
1/4 cup coconut oil or lard ( I put in solid lard)
2 eggs, beaten
1/4 cup sorghum or honey
1 1/2 cups buttermilk

Stir together well and pour into a greased skillet (or in my case, a stoneware) and Bake at 400F for 20 minutes or until golden brown.

Serve warm with butter, or in our case, with honey or jam as a desert!

Tuesday, 6 March 2012

Zuppa Toscana Soup Recipe ~ Italian Sausage Soup

A dear friend from Manitoba not only MADE me this delicious soup on a few occasions, she even delivered it to my door when we were renovating there.  So sweet, my ultimate favourite soup of all time.  Reminds me of going to the Olive Gardens in Winnipeg when I was a college girl.   Endless soup and bread sticks for under $7 ( I think) and many a bread stick came home in our purses!


Zuppa Toscana Soup                                                              
 
1 lb spicy Italian sausage
1/2 lb smoked bacon chopped
1 qt water
(2) 14.5 oz cans (about 3- 2/3 cups) chicken broth
2 lg russet potatoes- cubed
2 garlic cloves, crushed
1 med onion- chopped
2 cups chopped kale OR swiss chard
1 cup heavy whipping cran
salt and pepper to taste
 

  1. in a skillet over med-high heat, brown sausage, breaking into small pieces as you fry it, drain, set aside.
  2. in a skillet over med-high heat, brown bacon; drain, set aside.
  3. place water, broth, potatoes, garlic, and onion in a pot; simmer over med heat until potatoes are tender.
  4. add sausage and bacon to pot; simmer for 10 minutes.
  5. add swiss chard/kale and cream to pot; season with salt and pepper; heat through.
 
MY VERSION:
 

I use Swiss Chard and I use my own chicken stock made from saved up chicken bones from our roast chickens.  

You can also just use those little bouillon cubes if need be.  Or try beef stock.

Put the cream in afterwards and it keeps for longer.

Try adding more potatoes, etc and doubling the recipe.  I make BIG batches when I make this.  

Try with mild sausage or hot.

This soup really hits the spot on a chilly day! (It's also easy on the budget if you buy the sausage on a sale and add more potatoes.) Quick to make.


How to cook a moose roast recipe

Warning: This post contains pictures of raw meat.  hee hee

I've had some ask me how I cook all this moose meat God blessed us with this fall.  Basically, I just cook it!  This is hands down the best meat we have ever had...beef is now a poor 3rd to the moose and mule deer.  Our girls love the "wild" meat rather than basic beef.

There are some important things to know:  the moose and mule deer were fed in natural meadows, as organic as it comes.  They were "harvested" with very little stress (if they run, the adrenaline gets into their meat and you will taste it).  We cleaned them immediately and took them to hang in a cooler, they were not just chucked around and bruised, they bled out nicely.  They were free from a bunch of dirt, etc.  All these things make your meat very natural tasting and almost "sweet".

A good facility that is cool and clean is so important.
We learned that using water to wash it can also make it tough, so having little dirt/hair from the start is a real bonus.  Little tricks from others that have been doing this for their livelihood! Mom says not to "wash" meat, as it makes it tough.  So if you're careful when you're skinning the meat, you shouldn't have to wash hardly any of it. Don't leave dirt or hair on your meat though either ~ it will taste worse that a rubber boot!
A happy constitution is also important

Can't say enough about good packaging.  Good wrapping keeps air out.
No freezer burnt meat.  Use a paper based tape/masking tape or the plastic taste
may get into your meat.
When we were doing up the meat, we would take a few trays of meat to the freezer at one time...lie it out as flat as possible, let it freeze, then add more.  Make sure the blood is drained out, as blood leaking out of your wrapping is never appealing . We let our meat hang in a cooler for a few days, so blood was not an issue for us....I don't think I could have stomached that when we were cutting it up. It also makes it easier to remove one package at a time, and your freezer doesn't have to work so hard to freeze it all at once.
Take your time cutting meat.  The nicer it is going into the freezer,
the better it will be coming out.  We tried to trim everything off, but this
 little bit of white was not noticeable once cooked.
This roast I added French Onion Soup mix, some seasoning salt, onions and
some rosemary.  I put a little water in the roaster as I was adding potatoes later.
I cooked it at 350F for about 1 hour (from frozen) and then added the potatoes, onions, carrots.
I did use my covered roaster for this.
All finished, it was so tender!  

I used an electric knife to slice.  Our company is always amazed that it doesn't
taste "wild" and they all go for second helpings.
 I cook moose and deer the same way I do beef.  Onion soup mix is a wonderful addition.  Don't under cook wild meat, but don't cook it to death either...then it is jerky!  It took us a few days (and some help from some Alberta cousins) to cut up all the moose...we were getting better at it in the end.  It's all about learning!

 THRIFTY NOTE:  The moose/deer all said and done, hunting license, 2 bullets, gas, packing paper and tape, cost about $75 for 400 lbs of meat. There is still tape and packing left over.

I shared this on Frugally Sustainable Blog Hop Wedsnesdays Click Here

Tuesday, 28 February 2012

Make your own Mozzarella Cheese Recipe ~ Homemade!


Ok, so I've made mozzarella cheese two times now.  Two different ways, forgot to take pics the first time.  It is very edible and disappeared fast.  Great on pizza.  I will try another recipe later and take more photos.

Assemble your ingredients and supplies.  My recipe called for lemon juice instead of citric acid and rennet tablets.  I have no clue where you get those, these are from a neighbour.  I'm guessing a health food place would help you.

 
This is my big stainless steel (don't use aluminum) stock pot.  Approx. 3 gallons of milk, partially skimmed. Add 3/4 cup of lemon juice to this and stir.
Heat slowly, stirring, to 90F


Add 1/2 tablet of rennet that was dissolved in a little warm water.  Stirring.

Remove from heat.  Stir for 2 minutes.  Site 10 minutes and it looks like this:  weird custard jello texture.

Start slicing in 1 inch lines, then across the other way to make cubes.  Let sit 10 minutes and the whey will start separating again.
 See it is getting that whey on top.
 Drain off the whey.  This is where some recipes differ.  This is one version.  I won't probably do this one again, as see how full the colander was! Other version slowly stir the curds and heat them back up before straining.
 Whey.
 Picture of Bosch machine ready for the whey to be added and make bread!

 The curds
 I heated a kettle of water with 1/2 cup salt.  Poured it over the curds in the pan again, stirring...HOT!  Tried to stretch it out with spoon, not working that well so used my hands.
 Stringy mozzarella cheese!
 A bit lumper than the 1st time, a different recipe.
Yum yum
Don't forget that you can add herbs to your cheese like Dill, Garlic, etc and have a very nice fancy pants cheese for on crackers, etc!


Here are 3 recipes for Mozzarella Cheese
What I've found so far is that it doesn't always have to sit for as long as they say.

Mozza Cheese
2 gallons whole milk (8 l)
2.5 tsp citric acid (dilute in 1/4 cup cool water)
1/4 tablet rennet (dissolved in 1/4 cup cool water)
1/2 gallon water (heated to a boil)
1/2 cup salt (dissolved in above hot water)

Stir citric acid into cold milk,  Stir 2 min.
Heat milk to 88 F and remove from heat.
Add rennet.  Stir for 30 secs.
Let mixture stand for 30 minutes or until it gels.
Cut into 1 inch squares.
Sit for 15 mins as whey separates from curds.
Heat slowly to 108 F and keep well stirred.
Remove from heat and allow to stand for 20 mins, stirring occasionally.
Drain in colander for 15 min.
Cut curd into 1 inch strips and lay criss-cross in a bowl.
Pour hot salt water over curd strips and stretch with a wooden spoon, pulling up and down until soft.
Gather and shape in a ball.  Place in container or mold and refrigerate

2. Mozza Cheese
Pour 3 gallons of milk ( cream included ) in big pan
Add 3/4 c/ lemon juice
heat until 88' .Turn stove off and add 1/2 tablet of rennet, that has been soaking in abit of water.
Stir really good for about 2mins.Then let it rest  for another 10 mins. By then it should have solidify.
Leave for 30 mins or longer ( sometimes I leave it for an hour ) and then slice in chunks. Drain though my cheese bag and squeeze all the whey out of it ( you can use part of that for bread making and the rest for the chickens) Drain well.
Put the curds back in pan add cold water until it covers most of the curds. Add 1/2 cup salt, and then gently heat until the cheese becomes every soft and stretches. I almost bring it to boiling. Stir often.
Then  pour through a colander, and when you can handle the cheese, knead it and it is ready to eat. Enjoy !!

Recipe #3  
What I do is. One gallon of milk (I fill my pot and it still works) Mix 1-1/2 tsp of citric acid in one cup cool water, then mix into the milk, stirring vigorously. Meanwhile dissolve 1/4 tablet of rennet into 1/4 cup water.
Heat milk to 90 dgrs. Mix in the rennet and let sit for about seven minutes. When you push your finger against the curd it should make what is called a clean break, the curd should split and you should see the whey fill in the around your finger. The curd will look like custard. Using a sharp knife cut the curd into about half in squares, back and forth and sideways.

Heat again to 105 while slowly moving the curds around to keep them from packing together.

Take off the burrner and slowly stir for 2-5 minutes (I usually do about 3)

Pour off the floating whey and ladle the curds into a microwave proof bowl. Microwave on high for one minute, drain off the whey and gently fold the curds into one piece.

Microwave for another 30 seconds. Drain again and stretch the curd (like you would taffy) The curd has to be 135 Dgrs to work properly. It will start getting really smooth and silky. If it isn't hot enough, microwave until it is.

Shape into a ball and submerge in cold water, this helps it keep it shape and keep it from getting grainy.

I have to submerge it quickly, because the warm fresh cheese is so yummy I could eat it all. (not quite, but it is good)

This sounds involved but you will have it done in about an hour.

As a footnote, I have done Recipe #3 using the microwave for 1 minute, then 30 secs. and another 30secs.  The cheese temperature was hot at 135F and I could quickly pull it with my bare hands and then form it into a shape.  I wrapped them in wax paper, then put in a freezer bag or container.  They will be yummy on pizza later!
The recipe took me approx. 30 minutes!
I shared this on Frugally Sustainable Click HERE